Contents
Introduction
This tutorial describes how EMF and GMF based Eclipse applications can be
augmented by XMF. It builds upon the Hello
XMF tutorial, which is the starting point for working with XMF and Eclipse
in general.
To top.
Installing the EMF Projects
The starting point for developing an integrated EMF-XMF application is to
create the EMF projects that form the backbone of the application. This tutorial
assumes that readers are familiar with the basics of building EMF-based applications,
and as a shortcut uses the Taipan tutorial introduced in the GMF
Tutorial.
Taipan! is a
computer based strategy from the eighties. For the purposes of this tutorial,
the only knowledge required about Taipan! is that ships can be added
to the games and cargo of various weights can be added to the ships.
The Taipan projects can be obtained from the Eclipse Modeling Project CVS
repository here.
The required projects are as follows:
| org.eclipse.gmf.examples.taipan |
The main EMF model project |
| org.eclipse.gmf.examples.taipan.edit |
The core adaptor classes |
| org.eclipse.gmf.examples.taipan.editor |
Tree editor (navigator) support |
| org.eclipse.gmf.examples.taipan.gmf.editor |
Graphical editor support |
Download the above projects (follow the instructions in GMF
Tutorial if you are not familiar with CVS), and add them to your workspace.
Your workspace navigator should look like this:

To top.
Creating the XMF Plugin Project
The next step is to create an XMF plugin project to deploy the XMF code into.
Whilst you could deploy the code into one of the existing projects, it is
preferable to create a new project to both maintain separation of concerns
and to get all the XMF project settings and supporting files that you get
free when you create an XMF plugin project from scratch.
As mentioned in the introduction, the application in this tutorial uses XMF
to add behaviour to the base EMF application, and uses menus to access that
behaviour, so when creating the XMF project, it is a good idea to use the
opportunity given to add the menu handling machinery at the same time.
Creating an XMF project is covered in the Hello
XMF Tutorial, so much of the detail is skipped here. Follow the instructions
there, creating an XMF project called 'org.eclipse.gmf.examples.taipan.xmf',
until you get to the custom template screen:

As depicted above, make sure you have the following set:
- the 'Load the program when a menu is invoked' radio button is selected
- 'EMF connectivity required' is checked
- a name for the menu handler class is set (such as 'MenuHandler')
- the 'com.ceteva.xmf.system.machine' XMF machine is chosen (accessed via
the 'Choose...' button)
After completing the project creation wizard, your workspace navigator should
look like this:

To top.
Deploying the XMF Code
Having set up the XMF plugin project, the XMF code can now be deployed from
the EMF ECore model.
Expand the org.eclipse.gmf.examples.taipan model and open up the
taipan.ecore model file with the Ecore Model Editor. This will give
you a tree editor for the taipan model as shown below:

Right click on the taipan model node (not the top level resource
node) and select 'Generate XMF Code' from the menu.

The first dialog presented allows the user to select the packages, classes
and structural features in the ECore model that they want to deploy. In this
case, the complete model is to be deployed, so just click on 'OK'.

The next dialog asks which project in your workspace to deploy the code into.
The code will automatically be added into the 'xmf-src' directory in that
project's root directory. Select the org.eclipse.gmf.examples.taipan.xmf
project created in the previous section.

Once the code has been deployed, you can browse the code in the 'xmf-src'
directory. A separate xmf source file has been created for each package and
class. In addition, an appropriate manifest file has been created to ensure
appropriate compile and load management.

To top.
Setting Up the XMF Project
Whilst much of the machinery required for integrating the XMF project with
the EMF application is set up when creating the XMF plugin project, some modifications
are required post deployment to get it all working.
Adding dependencies to the Eclipse manifest
Two dependencies need to be added to the Eclipse manifest for the org.eclipse.gmf.examples.taipan.xmf
project. Open the META-INF/MANIFEST.MF file using the manifest
editor and add:
- com.ceteva.xmf.dialogs
- org.eclipse.gmf.examples.taipan
The former is required only if dialogs are used in the XMF code (which they
are in this case). The latter is the project that contains the EMF model code.
The resulting dependency list is shown below with the new dependencies highlighted:

To top.
Setting the ePackage binding
When the XMF code is deployed, the package name is determined by the name
of the ECore model, but unlike the XMF code, the EMF code is not generated
from the ECore model directly, but from a genmodel file that is in
turn generated from the ECore model. A potential problem arises here in that
the the path for the generated EMF code is determined by the value of the
genmodel file's 'Model Directory' property, which may be different
to the ECore model name defined in the ECore model. The upshot of this is
that if the 'Model Directory' property is different to the ECore model name,
XMF will not be able to find the EMF classes. This is easily rectified however.
Determine the full java path of the package that contains the EMF model classes
by browsing the src directory in the main model plugin, in this case
org.eclipse.gmf.examples.taipan, until you find one of the model
class source file, such as Ship.java:

Make a note of the the package name (highlighted above), declared near the
top of the source file, in this case "org.eclipse.gmf.examples.taipan"
(note that although this is the same as the name of the project here, it needn't
be the same).
Now open the XMF source file for the package in the xmf-src directory,
in this case taipan.xmf. In it there is a binding defined called
"ePackage" which is used by XMF to locate the EMF classes. This
needs to be set to the actual java package path determined above. So in this
case, the line specifying the ePackage binding will be:
To top.
XMF / EMF integration complete
At this point the XMF project has been set up to be integrated with the EMF
application. This means that whenever an EMF object is created, it is in effect
given an XMF wrapper, upon which additional behaviour can be defined to performed
on that object. As it stands however, no additional behaviour has been defined.
This is covered in the following section.
To top.
Adding Behaviour
In this section, behaviour will be added to the EMF application through XMF
which will be accessible to the user via a menu. In particular, an XMF operation
will be defined to calculate the total cargo weight of a ship. Users will
access this via a menu off Ship objects in the Taipan tree editor.
Modifying
the menu extension contribution
When the XMF plugin project is created a default menu extension contribution
is created in the projects plugin.xml file. This needs to be tailored
to the requirements of the application.
Open the plugin.xml file (using either the Plugin Editor extensions
tab or the standard text editor) and make the following modifications to the
org.eclipse.ui.popupMenus contribution :
- set the value of the objectClass attribute of the objectContribution
element to the class of objects that will present the menu (in this case
the org.eclipse.gmf.examples.taipan.Ship class)
- set the label and tooltip attributes of the action
element appropriately (in this case, set them both to 'Calculate Total Cargo
Weight')
- set the appropriate multiplicity for the menu - in this case, the menu
is only appropriate when a single Ship object is selected, so an enablesFor="1"
attribute is added to the action element
The final menu contribution looks like this:
   <extension point="org.eclipse.ui.popupMenus">
      <objectContribution
            objectClass="org.eclipse.gmf.examples.taipan.Ship"
            id="menu.handler">
         <action
               label="Calculate Total Cargo Weight"
               tooltip="Calculate Total Cargo Weight"
               class="org.eclipse.gmf.examples.taipan.xmf.MenuHandler"
               id="menu.handler.action"
               enablesFor="1">
         </action>
      </objectContribution>
</extension>Setting up
the MenuHandler class
Having set up the menu extension contribution, the MenuHandler java class
needs to be set up to do the following:
- handle selection events appropriately
- invoke an XMF service to carry out the required behaviour
Below is the entire code, annotated where appropriate to show the changes
made from the default MenuHandler code generated when the project was created.
The above line sets up the current selection as a local
variable that can be accessed by the run method below - this will be
the Ship object that the calculation will be performed on.
The run method is modified to do the following
- get the current selected object
- check it is an instance of Ship
- call the calcCargoWeight on the casted Ship instance
To top.
Creating the XMF service
This section describes how to define the "taipan.calcCargoWeight"
service that is to be invoked when the 'Calculate Total Cargo Weight' menu
is handled.
Open the xmf-src directory, and create a new XMF file to the root
manifest (this is described in the 'Writing XMF source code section' of the
Hello XMF tutorial), and name it 'Services.xmf'.
Edit the new Services.xmf file and add the following code:
parserImport XOCL;

@Service taipan.calcCargoWeight(ship:Ship)
  let weight = ship.calcCargoWeight()
  in
    xmf.info("Cargo Weight", "Total cargo weight = " + weight)
  end
end;
This service takes a single argument of type Ship, and carries out the following:
- calls the calcCargoWeight operation on the Ship object
- assigns the resulting value to a local variable weight
- presents the value of weight to the user via a simple message
dialog (using xmf.info)
To top.
Defining the behaviour
The final step of the process of adding behaviour is define the actual
behaviour! This is a relatively trivial step in this tutorial - subsequent
tutorials take this as a starting point and show you how to define increasingly
sophisticated behaviour.
Back to the Taipan application then: the following operation needs to be
added to the Ship.xmf source file in the xmf-src/taipan
directory (just before the final "end" line in the existing code):
    @Operation calcCargoWeight()
      let totalWeight = 0
      in
        @For item in self.getCargo() do
          if item.isKindOf(LargeItem)
          then
            totalWeight := totalWeight + item.getWeight()
          end
        end;
        totalWeight
      end
    end
This iterates over all the items in the ship's cargo, and if the item is
a LargeItem (the only type of item to have actual weight) then its weight
it added to a running total. The final weight value is returned on completion
of the iteration.
Note that the getCargo and getWeight operations are not
defined explicitly in XMF - they are methods that are defined in the EMF java
code, and are available as implicit operations in XMF.
The application is now ready for testing.
To top.
Running the Application
Create and start up a launch configuration for Taipan (this is described
in the 'Running XMF Applications' of the Hello
XMF tutorial). Once the Taipan application has started up, create a new
standard project, and add a new Taipan model via the New > Other right
click menu:

When asked which model object to create, select the Ship class from the drop
down list:

You now have a ship with no cargo. To add the cargo, select New Child >
Large Item from the right click menu off the Ship:

Show the properties for the newly created Large Item (by selecting Show Properties
from the right click menu), and enter a value for the 'Weight' property. Create
as many items as you wish in this way, and set the weight accordingly. You
are now ready to calculate the ship's total cargo weight.
Right click on the Ship and select 'Calculate Total Cargo Weight':

The result is displayed in a message dialog as depicted below.

To top.
Setting Up the GMF Diagram Editor
If GMF diagram editor support has been provided for the EMF application,
it is relatively straight forward to modify the XMF project to integrate with
this too.
Modifying the XMF project to support
GMF
First of all an additional dependency needs to be added to the Eclipse project
manifest:
- org.eclipse.gmf.runtime.diagram.ui
An additional menu extension contribution then needs to be added to the plugin.xml
to make the menu available on Ship diagram nodes (instances of ShipEditPart):
      <objectContribution
            objectClass="org.eclipse.gmf.examples.taipan.gmf.editor.edit.parts.ShipEditPart"
            id="diagram.menu.handler">
         <action
               label="Calculate Total Cargo Weight"
               tooltip="Calculate Total Cargo Weight"
               class="org.eclipse.gmf.examples.taipan.xmf.MenuHandler"
               id="menu.handler.action"
               enablesFor="1">
         </action>
      </objectContribution>
Finally, the MenuHandler java code needs to be modified in two places:
Running the application with GMF support
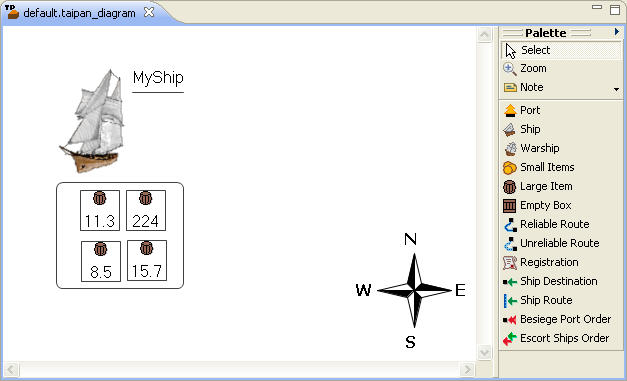
Restart the Taipan application, and in the previously created project, create
a new Taipan diagram by selecting New > Example from the project right
click menu, and selecting 'TaiPan diagram'.
Create a Ship from the diagram editor palette, add LargeItems to its cargo
box and set the weights in a similar to fashion to that described for the
normal EMF application above.
Selecting 'Calculate Total Cargo Weight' from the ship right click menu produces
a dialog with the total weight as before.
To top.